Installation
Categories:
Installation
psLens has two parts to install: the SWS framework in your PeopleSoft environment, and the psLens application on a server.
Hosting psLens yourself in production? This page walks through the basic “Docker on one host” install. For client-hosted deployments that need HTTPS, version pinning, backups, and a clear upgrade story, read Deployment Options after this page.
Step 1: Install the SWS Framework in PeopleSoft
psLens reads data from PeopleSoft through the SWS (Secure Web Services) framework, developed by Cedar Hills Group. SWS exposes a REST API; psLens calls it instead of talking to the database directly.
What SWS Provides
- A PeopleSoft Integration Broker service (
CHG_SWS_PSOFTQL) that psLens calls - A psoftQL query language for structured data access
- Role-based API authentication using PeopleSoft operator IDs
SWS Installation Steps
Full SWS installation instructions are available in the SWS installation guide. At a high level:
- Import the SWS PeopleSoft project into your environment using App Designer
- Activate the Integration Broker service and configure the listening connector
- Create a dedicated PeopleSoft operator ID for psLens API access
- Grant the operator ID the required permissions to read the tables psLens uses
- Test the API endpoint with a sample query
Tip: Create a dedicated operator ID for psLens (for example,
PSLENS_API) rather than using an existing account. This makes it easy to audit API activity and control access.
Whitelisting Tables
SWS controls which PeopleSoft tables can be queried through a whitelist. You need to whitelist every table that psLens reads.
The full inserts live on a dedicated page so this install procedure stays readable top to bottom:
Run all of the inserts on Whitelist Tables against each PeopleSoft database you plan to connect.
After running the inserts, restart psLens (or wait for the next whitelist cache refresh) and confirm the Settings > Database Connections page shows the database as fully connected with no missing-table warnings.
Step 2: Install psLens
psLens is distributed as a Docker image. Cedar Hills Group also offers a managed hosted option on Fly.io. Contact us for details.
System Requirements
- Docker: Docker Engine 20.10+ with Docker Compose
- Memory: 512 MB minimum, 1 GB recommended
- Disk: 1 GB for data storage (NATS report store)
- Network: Must be able to reach the PeopleSoft Integration Gateway on port 8000 (or your configured port)
Docker Installation
Authenticate with the GitHub Container Registry using the token provided by Cedar Hills Group:
echo "YOUR_TOKEN" | docker login ghcr.io -u USERNAME --password-stdinCreate a directory for psLens and add your configuration:
mkdir pslens && cd pslensCreate a
config.yamlfile (see Configuration for all options):server: port: 8080 host: "0.0.0.0" appBaseURL: "https://pslens.yourcompany.com" natsStoreDir: "/data/nats" databases: - name: "PROD" description: "Production HCM" baseURL: "https://peoplesoft.example.com/PSIGW/RESTListeningConnector/PSFT_HR/CHG_SWS_PSOFTQL/" username: "PSLENS_API_USER" password: "placeholder" timezone: "America/Chicago" production: true # red "PROD" badge + typed-name confirmation on Edit/DeleteProduction flag (
production: true) — When set, psLens displays a red “PROD” badge next to the database name in the top nav and gates destructive settings actions (Edit, Delete) behind a typed-name confirmation prompt on both the client and the server. The flag is read fromconfig.yamlonly — the value stored in the encrypted KV snapshot is ignored on every boot and re-overlaid from the file, so a production connection can never be silently un-flagged from the settings UI. To change the flag, editconfig.yamland restart psLens.Create a
docker-compose.ymlfile:services: pslens: image: ghcr.io/cedarhillsgroup/pslens:latest ports: - "8080:8080" volumes: - ./config.yaml:/app/config.yaml:ro - pslens_data:/data environment: - PSLENS_SERVER_HOST=0.0.0.0 - PSLENS_NATS_STORE_DIR=/data/nats - PSLENS_DB_PROD_PASSWORD=your-secure-password restart: unless-stopped volumes: pslens_data:Tip: Use environment variables for passwords instead of putting them in
config.yaml. ThePSLENS_DB_{NAME}_PASSWORDvariable overrides the password for each database.Start psLens:
docker compose up -d
Upgrading
Pull the latest image and restart:
docker compose pull pslens
docker compose up -d pslens
Air-Gapped Environments
For environments without internet access from the Docker host:
# On a machine with internet access:
docker pull ghcr.io/cedarhillsgroup/pslens:latest
docker save ghcr.io/cedarhillsgroup/pslens:latest | gzip > pslens.tar.gz

# Transfer file to the target host, then:
docker load < pslens.tar.gz
Bare-Metal Installation
psLens can also run as a standalone binary without Docker. Contact Cedar Hills Group for the binary distribution.
Run psLens as a system service so it starts automatically and restarts on failure.
systemd example (/etc/systemd/system/pslens.service):
[Unit]
Description=psLens PeopleSoft Dashboard
After=network.target

[Service]
Type=simple
User=pslens
WorkingDirectory=/opt/pslens
ExecStart=/opt/pslens/pslens
Restart=on-failure
RestartSec=5s

[Install]
WantedBy=multi-user.target
Enable and start:
sudo systemctl enable pslens
sudo systemctl start pslens
Verifying the Installation
Once psLens is running, open http://your-server:8080 in a browser. You should see the psLens dashboard. If your config.yaml is correct, the database connection indicator in the top navigation will show your configured databases as connected.
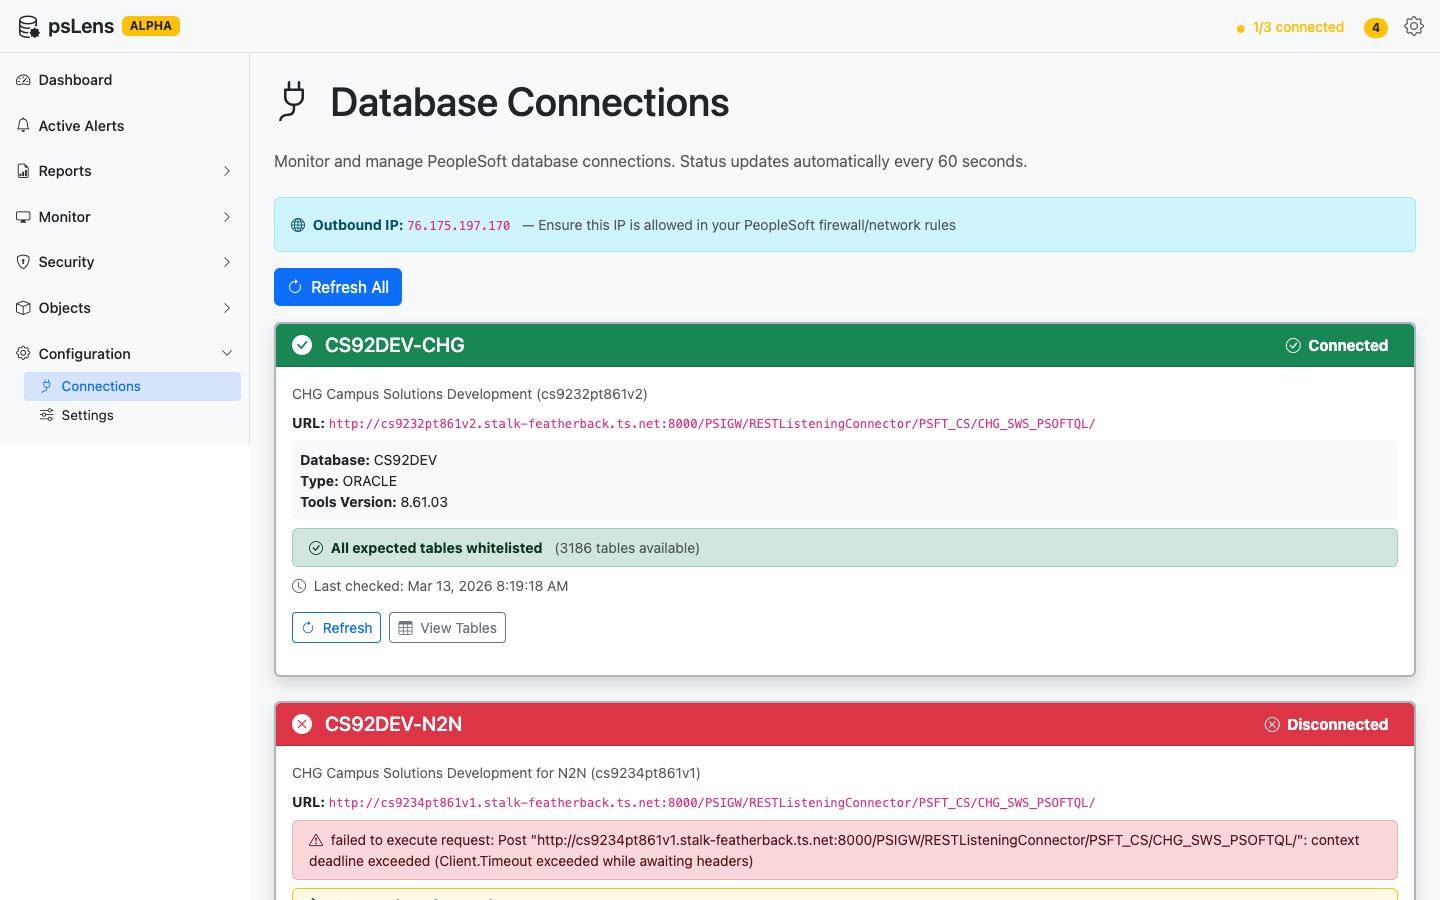
The Settings > Database Connections page shows connection status and diagnostics for each configured database
Next Steps
Once psLens is running, see Configuration for details on all the available settings, including how to configure multiple databases, enable alerts, and set up the data storage directory.